
Hello, and welcome to the second instalment of our Project Harrier blog series! For those joining us for the first time, it’s worth reiterating what this is all about. We have begun developing a new 1:32 first-generation Harrier family, with the first boxing being released in Q3 2027.
Rather than design the kit and begin tooling before announcing to the public, we wanted to do something slightly different: bring you along on the development journey and give you a behind-the-scenes look at the processes we go through to deliver a new kit. To that end, we’ll be providing monthly updates using a YouTube video series, blogs such as this one, plus occasional updates via social media and model shows. The blogs and videos themselves will be created by the development team working on the project, so you are hearing it directly from the horse’s mouth!
This month has seen our design team, Chris & Horatio, progress their respective elements of the design even further. The skeleton models are now essentially finished, and they will soon start splitting the design into individual parts before adding detail. We’ll be showing various parts of the work from the past month, plus talking about our recent visit to Chetton Heritage Museum, home to the only ground-running Harrier GR.3! We’ll also be addressing some of the feedback from our previous update.
Airframe Progress
As discussed in our first blog, work had begun before our first announcement to ensure we had something to show to our audience. This meant we were slightly out of sync with the actual progress of the jet; however, with this latest update being written on 3rd June 2026, we hope to bring our audience right back up to date within a few days.
Progress in the first months of a project can often appear quite slow, but it’s crucial to get it just right; a rushed skeleton model can lead to problems further down the line that require large amounts of work to correct, ultimately delaying the project.
Chris has continued to work away at the Skeleton model, and I hope you’ll agree it is now looking far more advanced. As you can see, we are starting work with the GR.3, but we will keep the other versions in mind when breaking the kit into individual parts.
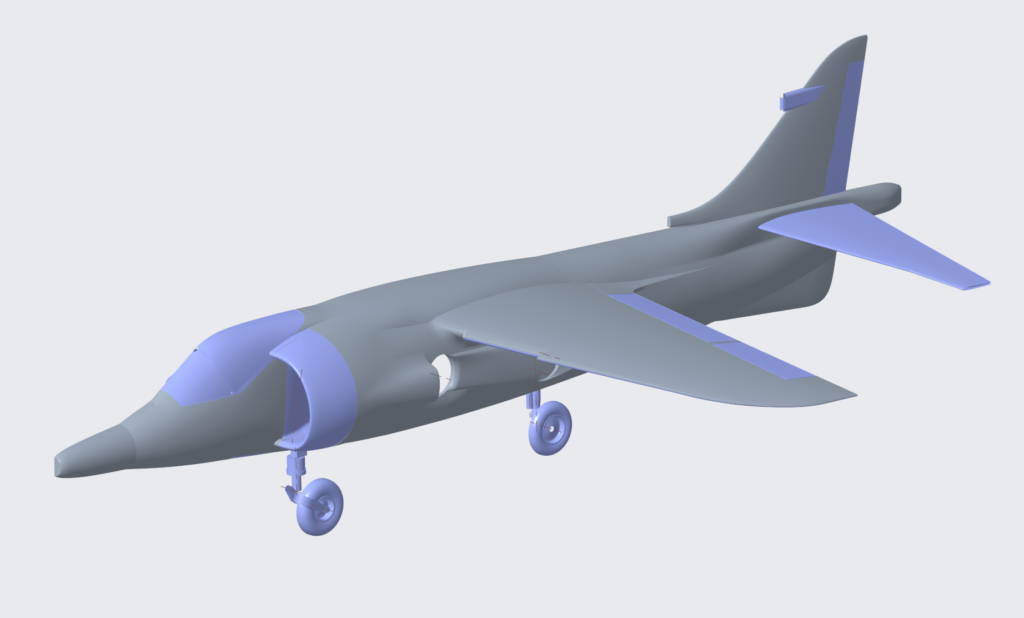
Figure 1: Overall airframe design of the Harrier
The addition of the undercarriage helps to bring the design to life; it’s certainly looking much more like a Harrier than the last time we checked in! Some of the areas that have proved particularly tricky are in front of the wing and around the vectored thrust nozzle aperture, where the Harrier curves and creases in unexpected ways that have tested the CAD software and designer. Some of these curves are not immediately evident from photographs or drawings; this is where the 3D scan really shines, helping us capture intricate details that have been missed on other renditions of the same subject.
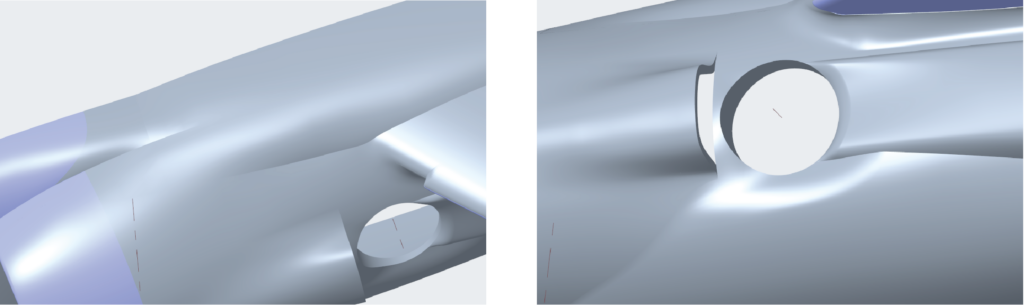
Figure 2: Tricky areas of the design
Now that the shape is pretty much there, Chris has turned his attention to the cockpit, an area that requires a lot of detail in a tight space. As shown in our first update, we have captured a lot of data for this area, and we’re working with subject matter experts such as the JaguHar to get all the small differences correct between the versions.

Figure 3: Initial work on the cockpit and surrounding areas
As you can see, Chris has been working out how the intake/cockpit/front wheel bay interacts; this involves a lot of ‘roughing’ out the shape. I have asked Chris to prioritise the cockpit area so that we can begin work on the pilot figure as soon as possible. In addition to this, the hope is that we can present 3D printed prototypes to you, our audience, at some of the shows in the coming months. We are currently aiming to have a complete cockpit on show at the IPMS Avon show on the 2nd August.
Engine Progress
Horatio has continued to plug away at the Pegasus engine, the main components have been created, and he is now focusing on all the gubbins atop the engine, such as the Fuel Control System and the maze of pipework.
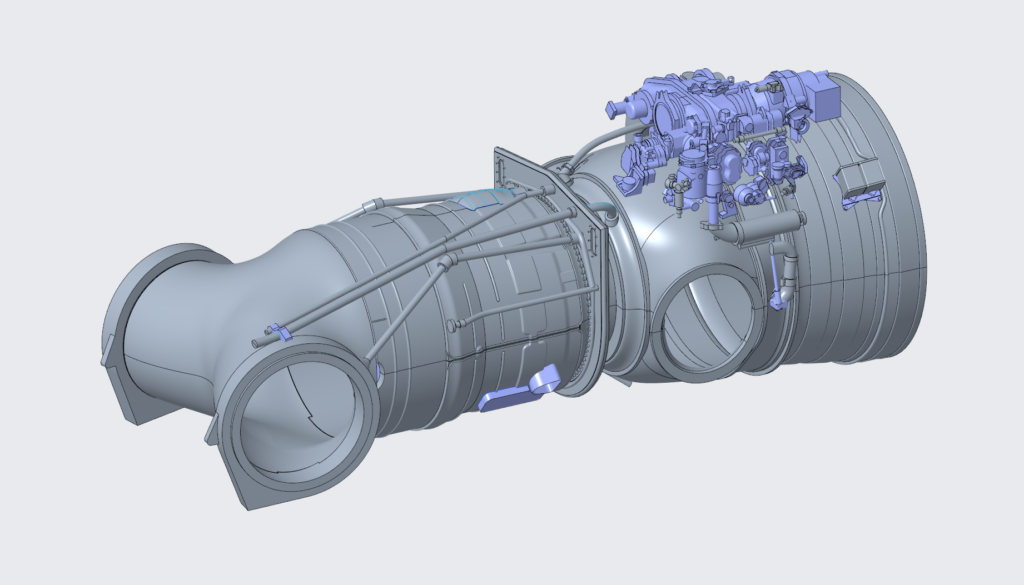
Figure 4: Latest image of the Pegasus design
It can often be helpful for the designer to 3D print subassemblies to double-check that the parts on the screen work as intended when translated to the physical world. This ‘little and often’ approach to prototyping, sometimes called iterative design, helps to create a better product and often speeds up the design process.
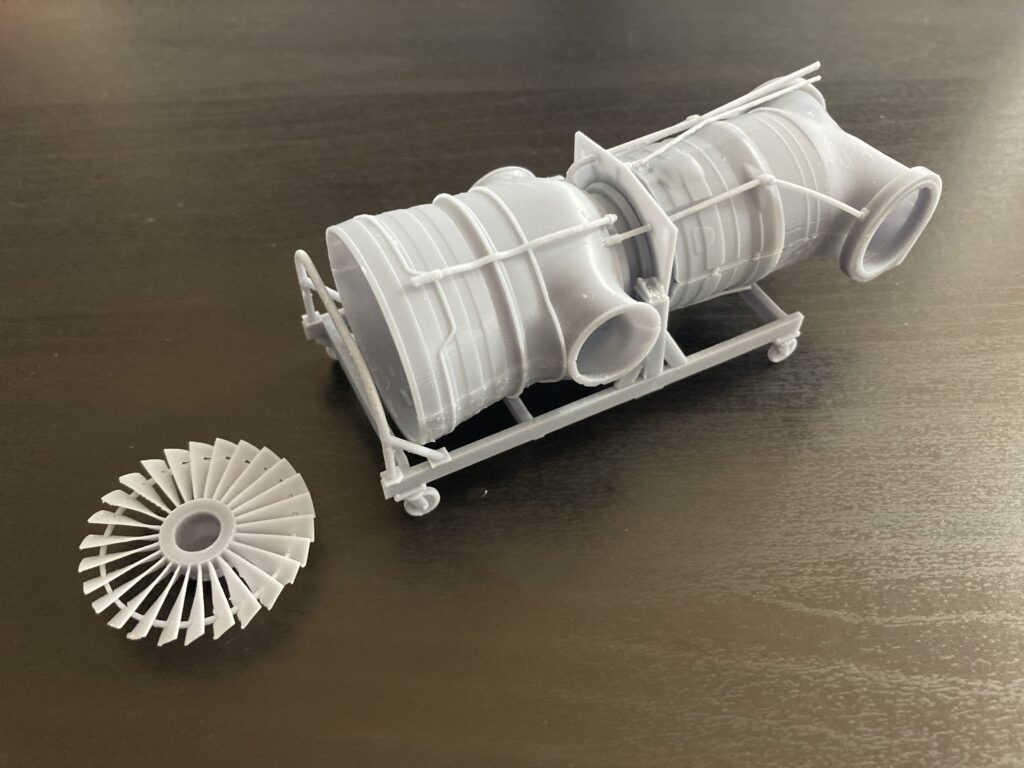
Figure 5: 3D printed of the major Pegasus components
Over the next month we’ll be having conversations around the constraints of injection moulding when it comes to the huge amount of pipework on the engine. We’re keen to keep this kit as ‘pure’ as possible, but this will obviously require us to make compromises. For the smaller pipes that are deemed implausible with injection moulding, we are looking at offering a wiring guide for those wanting to go the extra mile.
3D printing is another possible solution for this complex pipe problem but this comes at a cost, including a 3D printed part in all kits, which would raise the overall price to the customer. We therefore have to weigh up the advantages and disadvantages of including such a part in the box. Feel free to let me know what you think about this!
Visit to Chetton Heritage Museum
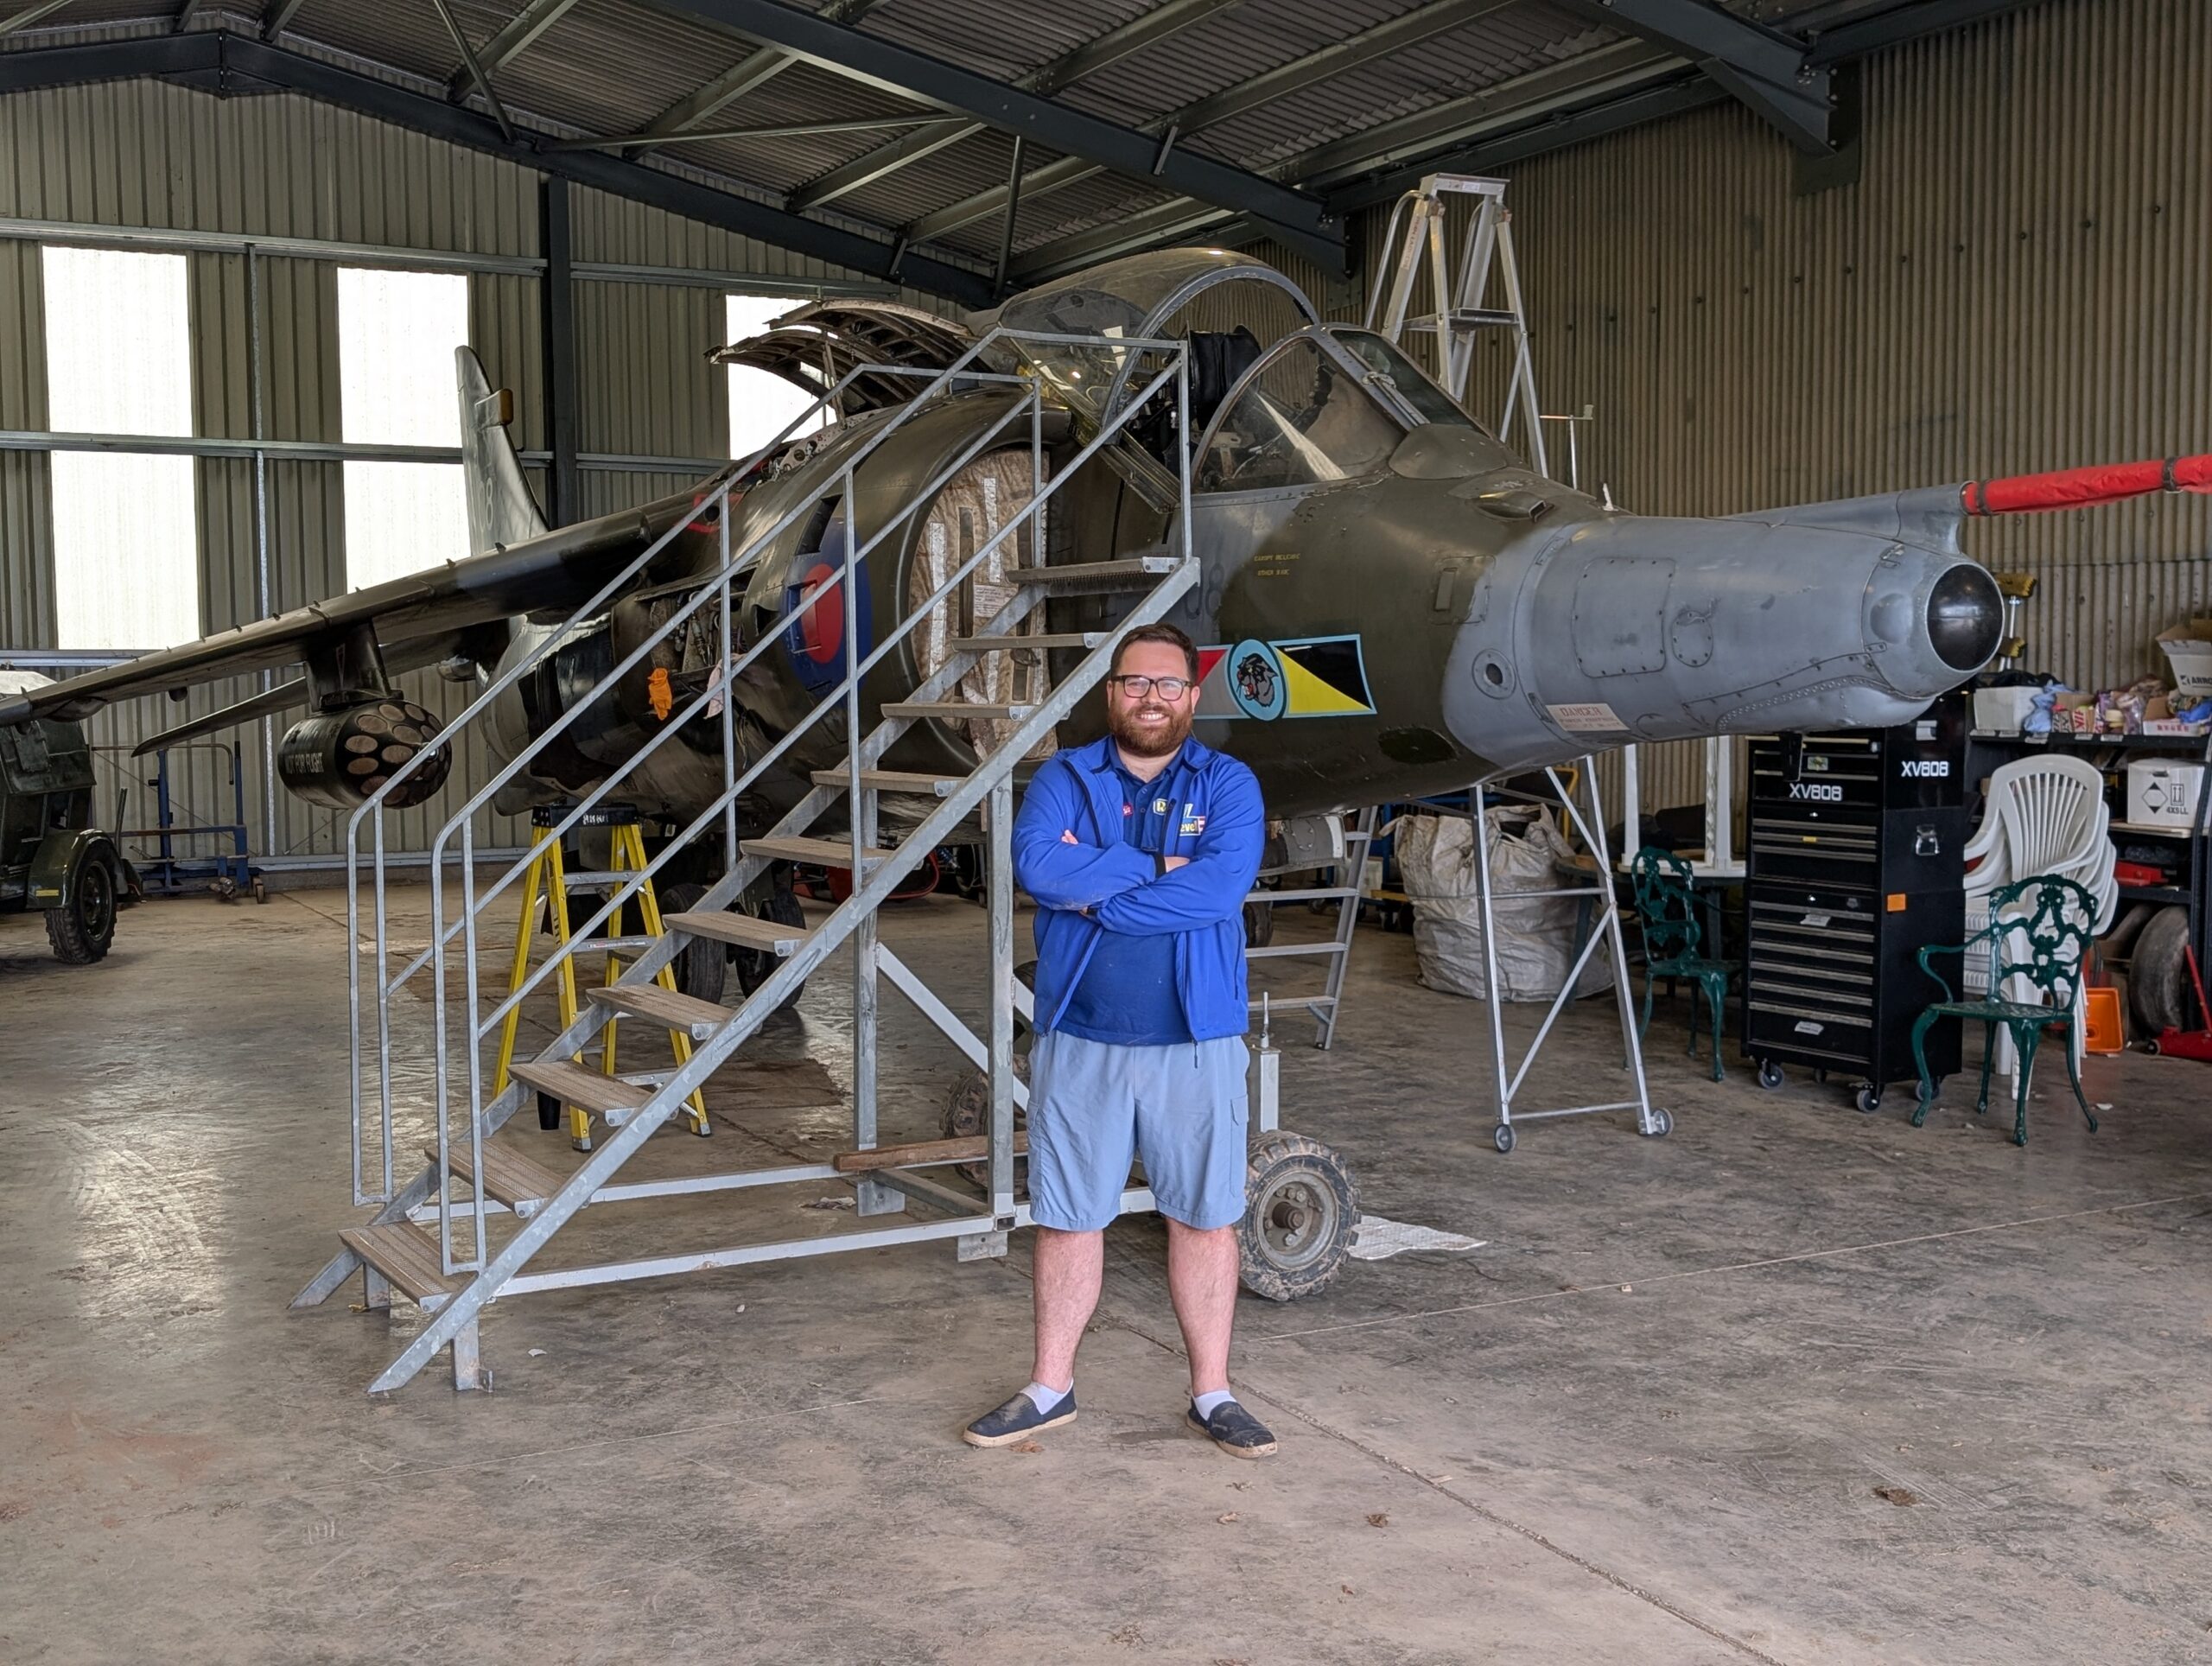
I was lucky enough to visit the team working on XV808 at Chetton Heritage Museum, this Harrier GR.3 is the only one in the world that is capable of ground runs. What the dedicated team have achieved is nothing short of remarkable and I would highly recommend visiting the museum or attending an open day!

Figure 6: It’s a hard job but somebody has to do it!
Aside from getting to pretend I was ground crew on Harriers for the day, there was some actual work to be done. Chris and Horatio were keen for some more information on various parts of the airframe and engine to ensure they were getting the shape just right. A designer will often ask for more information by providing a screenshot or image with a small annotation if a member of the team is visiting an airframe, see example below:
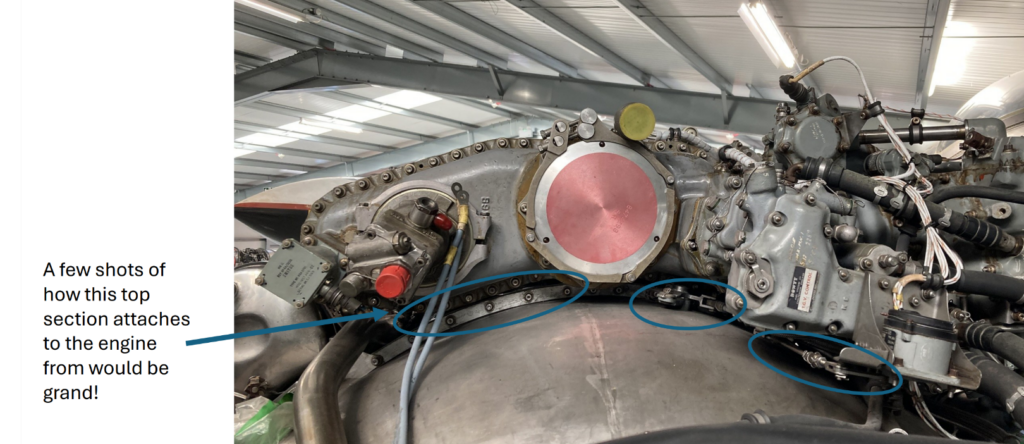
Figure 7: Example of a designer request
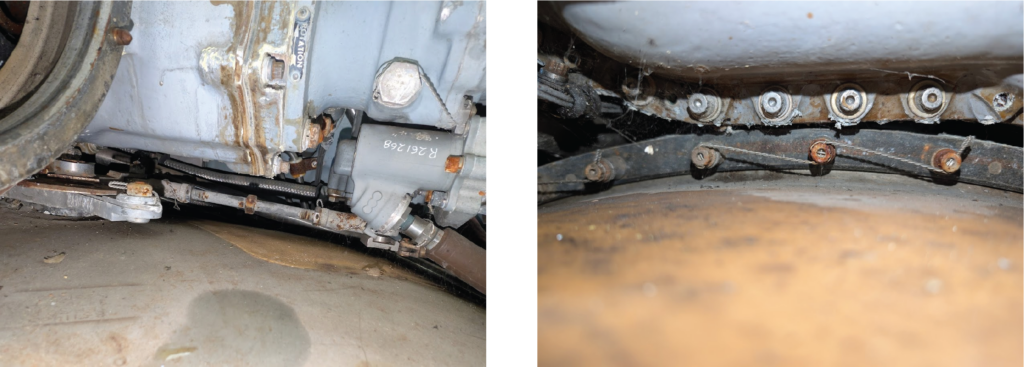
Figure 8: Feedback provided by the team on the ground
One of the advantages of visiting a ‘working’ jet is the ability to inspect areas not usually visible on museum aircraft. In this case, the team were kind enough to open up the engine panels, which gave us a great insight into how the Pegasus and Harrier interact. The team were also busy fixing the canopy bungees, which meant we were able to see the canopy removed, providing Chris with a great insight into the sliding mechanism that has proved tricky thus far.
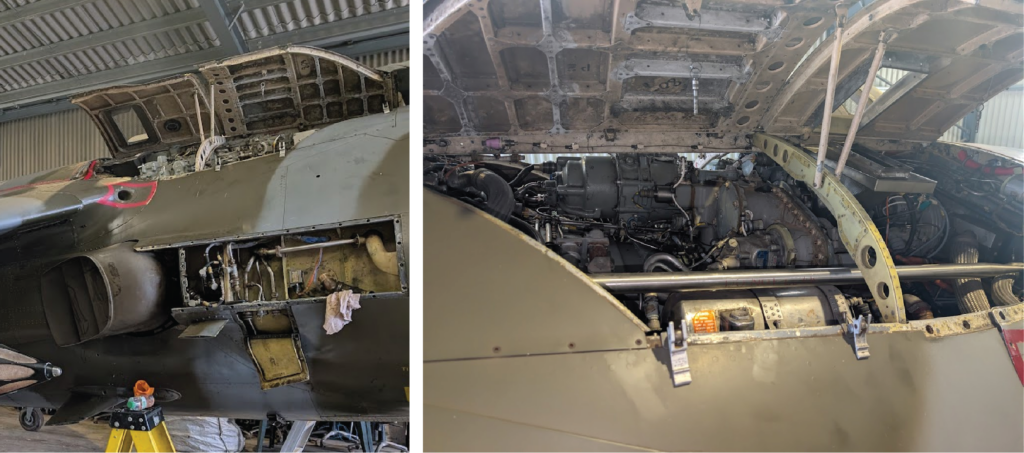
Figure 9: Engine panels open on XV808
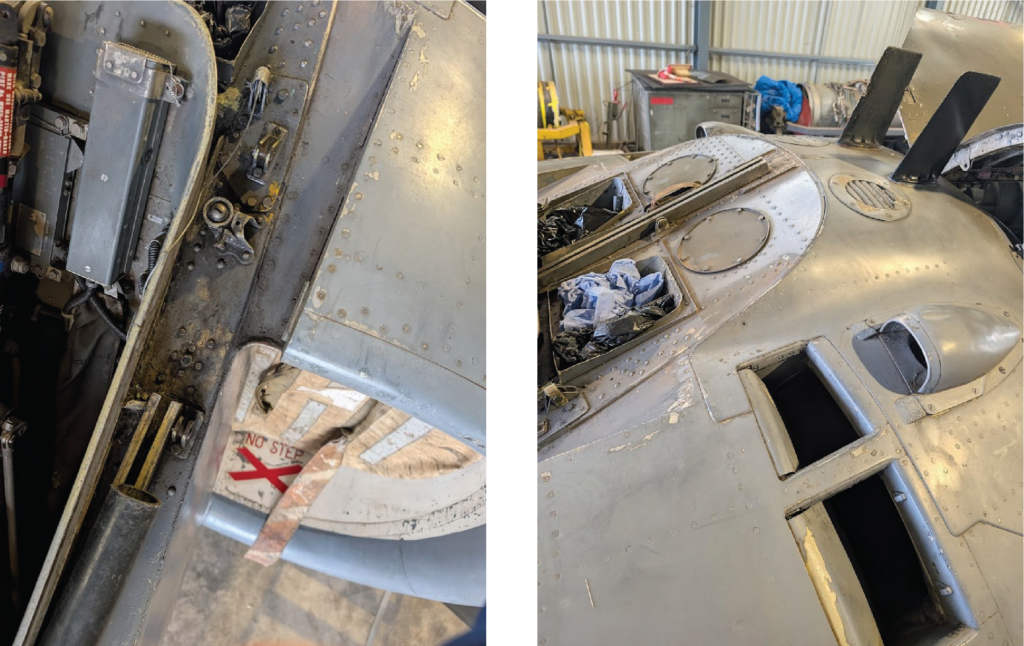
Figure 10: XV808 with canopy removed
As well as doing a bit of research, it also proved to be the ideal backdrop for our video series covering Project Harrier. In addition to filming the intro and outro sections, we were also privileged to speak to a member of the XV808 team with a rather special day job, you can find out more here:
https://www.youtube.com/watch?v=c8gqLyuR0DQ
What Next?
Over the next month, the design team will continue their work, and we’ll post another update in early July. If you have any suggestions for the product or how we can engage you throughout the whole development process, then please get in touch!
Finally, we would like to thank the team at the Chetton Heritage Museum for their support and for kindly allowing us to visit this month to photograph XV808.
If you would like to share your knowledge about the Harrier or point out common pitfalls, please send an email to info.de@carrera-revell.com with the subject line “Project Harrier”. I will try my best to read them all and answer them if possible!
Kind Regards,
Luke